
eARC Setup Guide: Fix HDMI Audio Handshakes
By Maya Chen • 12th Apr
An eARC soundbar implementation guide starts with understanding one critical fact: your TV needs a direct audio conversation with your soundbar, and HDMI 2.1 audio return channel technology makes that conversation both faster and cleaner than older methods. This single cable handles not just video heading to your TV, but audio returning back to your speaker (and when it works, it's the reason you can dial dialogue to a neighborly volume without losing a single whisper). If you're starting from scratch, follow our soundbar setup guide to get ARC, optical, and Bluetooth right before fine-tuning eARC.
Why eARC Matters More Than the Specs Suggest
I learned this the hard way. Thin walls, 11 PM movie night, toddler sleeping upstairs. My old setup forced a choice: turn up for the dialogue and get angry knocks during the explosions, or keep it quiet and miss half the story. The moment I wired eARC correctly, dialogue became clear at 35 volume, well below the threshold that traveled through the ceiling.
That's not magic. It's bandwidth and handshake reliability. ARC (Audio Return Channel in HDMI 1.4 and up) sends audio back through one cable instead of requiring a separate optical line. But eARC, the HDMI 2.1 upgrade, does it with 48 Gbps of bandwidth instead of 18 Gbps, which means Dolby Atmos and lossless formats work seamlessly. More importantly, eARC negotiates automatically between your TV and soundbar, keeping the audio pathway clean and your one-remote sanity intact.
For apartment dwellers, gamers, and anyone who's tired of cable clutter, this is the difference between "finally, it works" and "why won't this stay connected."
eARC vs. ARC: Which Do You Actually Need?
This choice hinges on one question: Do you want Atmos, or is standard 5.1 enough?
| Feature | ARC | eARC |
|---|---|---|
| Max Bandwidth | 18 Gbps | 48 Gbps |
| Audio Formats | Dolby Digital, DTS (compressed) | Dolby Atmos, DTS:X (lossless) |
| Auto Lip-Sync | Manual adjustment | Built-in |
| HDMI Requirement | 1.4 or higher | 2.1 (Premium High Speed) |
| Best For | Older TVs, streaming basics | Modern TVs, gaming, cinema-focused rooms |
If your TV is from 2015-2018 and you watch mostly Netflix and broadcast TV, ARC is sufficient. If you game on a current-gen console, watch 4K streaming with Atmos titles, or you're in a shared wall situation where clarity matters, eARC removes friction and unlocks the Atmos codec your TV can already extract from streaming apps.
Here's the pragmatic take: if your TV supports eARC, use it. The cable cost difference is negligible, and auto-sync alone saves weeks of lip-sync tweaking headaches.
The 3-Step eARC Setup Blueprint
Step 1: Verify Your Hardware Matches
Before you unbox anything, check three things:
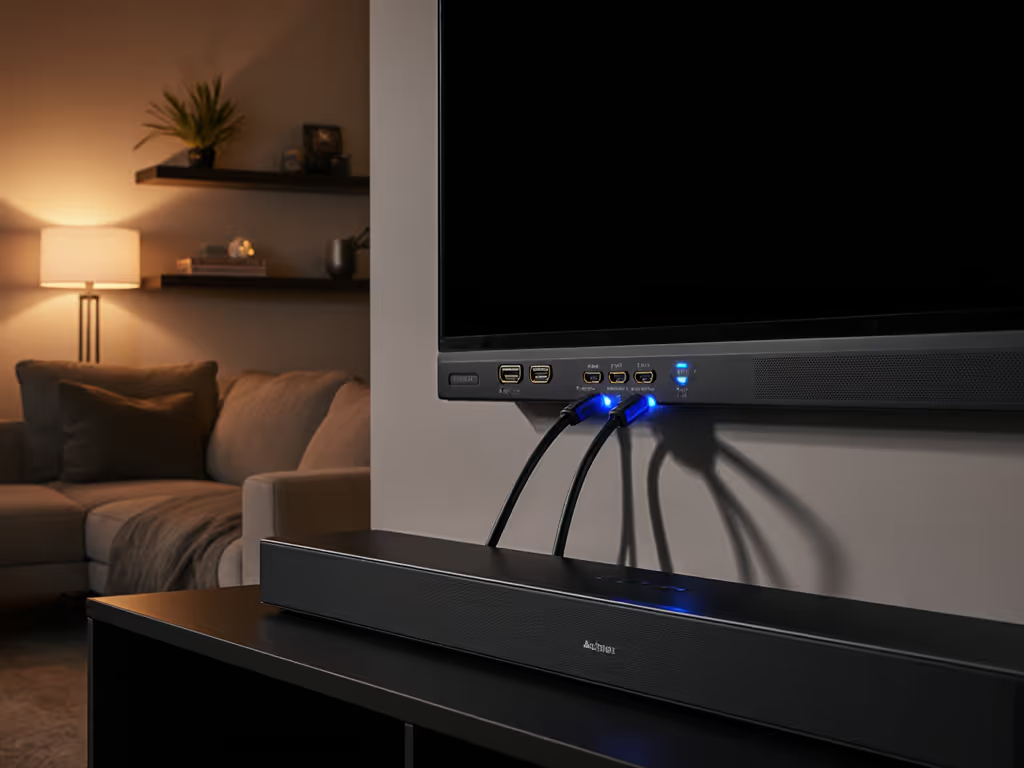
- TV: Look for an HDMI port labeled "ARC" or "eARC/ARC" (usually HDMI 3 or 4, not port 1). If unsure, check your TV's manual. Brand websites vary (Sony calls it "Bravia Sync," Samsung says "Anynet+").
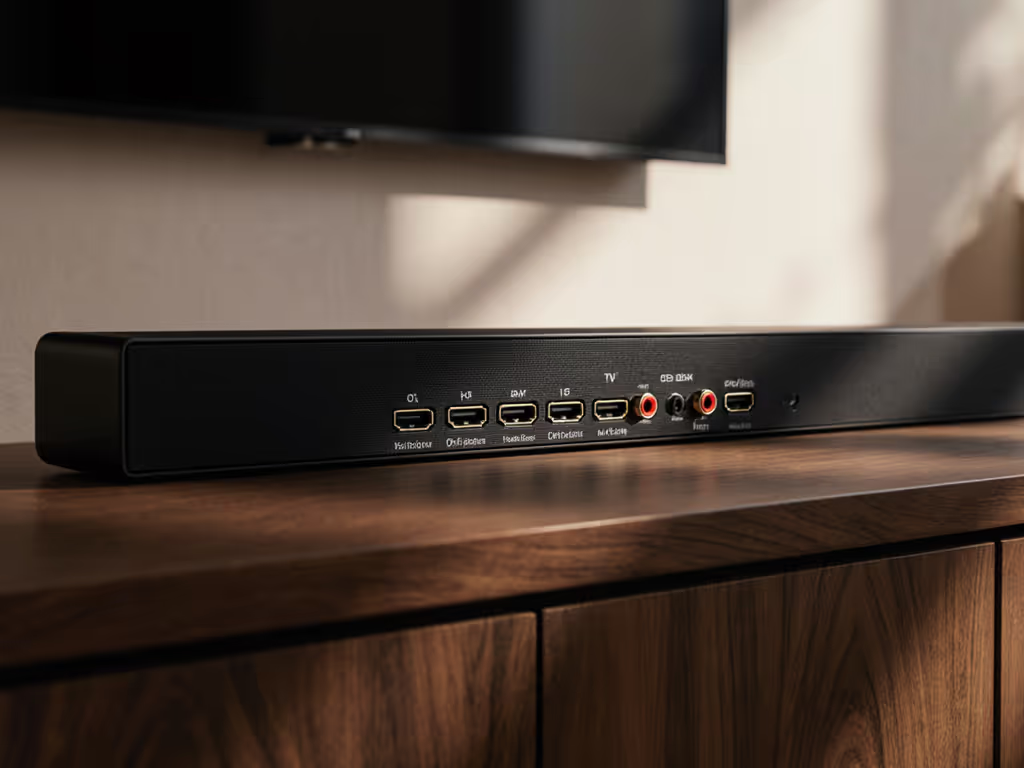
- Soundbar: Confirm it has a dedicated eARC/ARC HDMI port on the back. This is not the same as an HDMI input for a gaming console; it's the port that sends audio back to the bar.
- HDMI Cable: For eARC, you need a Premium High Speed HDMI 2.1 cable, not a standard or budget cable. For ARC, a standard High-Speed cable (2.0 or better) works.
If your TV predates 2015 or has zero HDMI ports labeled ARC, you're on optical audio. That's okay (it won't break), but you'll miss Atmos formats and one-remote automation.
Step 2: Connect and Configure Settings
Power both devices off for safety. Then:
-
Connect the HDMI cable from your TV's ARC/eARC port to the soundbar's ARC/eARC port. Don't overthink placement; just match the labels.
-
Enable HDMI-CEC (the magic behind one-remote control):
- TV: Go to Settings → Sound or Display & Sound → Audio Output → HDMI eARC/ARC Mode and set to Auto.
- Enable HDMI-CEC under a name like "Bravia Sync" or "Anynet+"
- Soundbar: Set input to HDMI ARC.
- Disable TV speakers (optional but recommended for a cable-light plan):
- Settings → Sound → Audio Output → Speakers: Audio System (not TV speakers).
- This ensures all sound routes through your soundbar and eliminates the "why is there audio from two places?" confusion renters often hit.
Most modern TVs and soundbars auto-detect eARC once you plug in the cable. If yours doesn't, a restart usually fixes it. If you still see erratic behavior with Apple TV, Roku, or Fire TV, try these HDMI-CEC compatibility fixes.
Step 3: Test and Calibrate Volume
Play a video with Atmos metadata (YouTube has 30-second demos). Open Settings on your TV and confirm the audio format reads as Dolby Atmos (or at least 5.1 PCM). Adjust volume so dialogue sits comfortably without waking the upstairs neighbor. Mark that volume on a sticky note or in your soundbar's app. It's your safe night-mode baseline.
Gaming Latency: Why eARC Matters for Console Players
Gamers often worry that eARC adds audio lag. It doesn't when configured correctly. Here's why:
- Gaming Mode on your TV (sometimes called "Game Optimizer") bypasses eARC processing during gaming, sending audio directly.
- 4K/120 Hz passthrough works on eARC as long as your HDMI 2.1 cable supports 48 Gbps.
- If you notice 100+ ms of lip-sync drift during gameplay, the culprit is your TV's audio processor, not eARC itself. Disable post-processing in your soundbar's app settings.
Test with a rhythm game or fighting game where audio-visual sync is obvious. For measured results on VRR, ALLM, and 4K/120 passthrough, see our HDMI 2.1 gaming soundbar tests. If dialogue matches lip movement in Netflix, your gaming setup is fine.
Troubleshooting the Handshake
If your soundbar isn't receiving audio via eARC:
"The connection works sometimes, then dies." This usually means HDMI-CEC negotiation is dropping. Restart both devices (full power cycle, 30 seconds off). Check that both ARC ports are labeled identically (eARC to eARC, not ARC to eARC mixed).
"Audio works, but Atmos doesn't appear." Your TV might not extract Atmos from the app. Try restarting Netflix or YouTube. If it still doesn't appear, your TV may not support Atmos passthrough. Check your model's spec sheet or call the TV maker. Optical audio definitely won't carry Atmos, so if you're on optical, eARC upgrade is the answer.
"Lip-sync is off by a frame." On ARC (not eARC), some older devices need manual adjustment in your soundbar's app. eARC handles this automatically. If you're still seeing drift, try disabling post-processing in Settings → Audio → "Dynamic Audio" or "Surround Simulation."
"One remote won't control the soundbar." HDMI-CEC is disabled on one device. Go back to Step 2 and confirm both TV and soundbar have it enabled. Some brands bury this setting three menus deep. Patience required.
The Neighbor-Peace Payoff
Once eARC is live and one-remote sanity is restored, you get something priceless: dialogue clarity at volumes that respect shared walls. Your soundbar's Atmos virtualization and higher bandwidth mean it's reproducing center-channel dialogue with precision, not struggling to push everything through a compressed audio stream.
Set your safe volume (35-40 on most bars), enable night mode, and rest assured: the whisper in Act 2 is clear, the explosion in Act 3 doesn't rattle windows, and your downstairs neighbor stays unaware. For quiet hours, check our late-night soundbar picks that keep dialogue clear at low volume.
Your Next Step
Open your soundbar and TV manuals side-by-side. Find the ARC/eARC port on each. If both say "eARC" and you can source a Premium High-Speed HDMI 2.1 cable (under $15 online), you've got everything needed. Set aside 20 minutes Sunday afternoon, work through the three steps, and run the Atmos demo test. If auto-sync works and dialogue is crisp at your safety volume, you're done, and $50 of frustration saved.
If you hit a snag, start with a full power cycle. Nine times out of ten, it's a handshake hiccup, not a hardware failure.
Related Articles


Audio Tech Explained
Harman Kardon MultiBeam Tech: Clear Dialogue, Room-Filling Sound
16th Jan•6 min read