Content creators know the struggle: you're recording voiceovers, monitoring streaming audio, or editing footage, and your TV's tinny speakers betray you. A soundbar for content creators changes everything, but only if you choose one designed for clarity over spectacle. This guide walks you through selecting and configuring a streaming soundbar setup that supports your dual life: professional-grade audio monitoring and comfortable shared viewing with your household.
Unlike gamers chasing immersive explosions or home-theater enthusiasts hunting Dolby Atmos fireworks, you need something sharper: a soundbar that renders dialogue with surgical precision, lets you hear subtle vocal textures, and pairs with your editing timeline. You also need a tool that respects your household's quiet hours and doesn't demand a cable-management nightmare in your creative space.
Why Content Creators Need a Different Approach to Soundbars
Your relationship with audio is different from the average viewer's. You're not just consuming content, you are evaluating it. Whether you're screening social-media clips, monitoring voiceover takes during editing, or reviewing exported sequences before posting, voice recording soundbar systems and podcasting workflows demand something conventional soundbar buyers ignore: center-channel fidelity and stable, repeatable midrange response.
Most soundbars optimize for theater-like immersion, burying dialogue in a wide soundstage or coloring it with bass bloom. But if you can't hear whispers clearly, your mixing decisions become suspect. You'll second-guess compression settings, room tone, and pacing. That's a slow leak in your creative confidence.
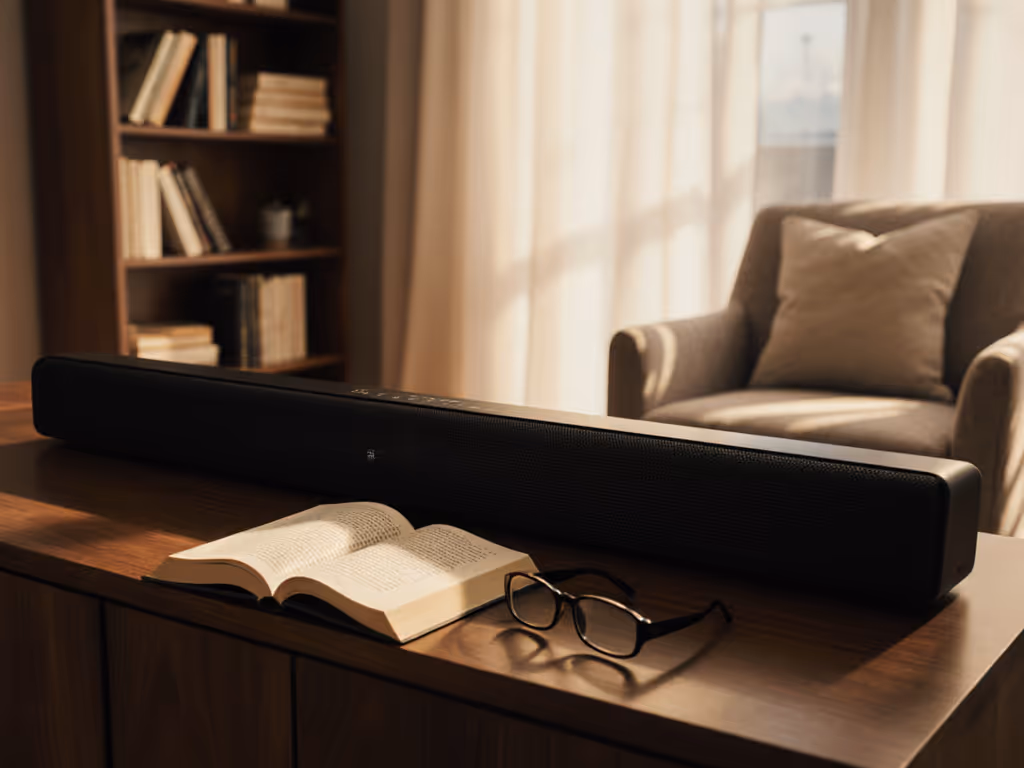
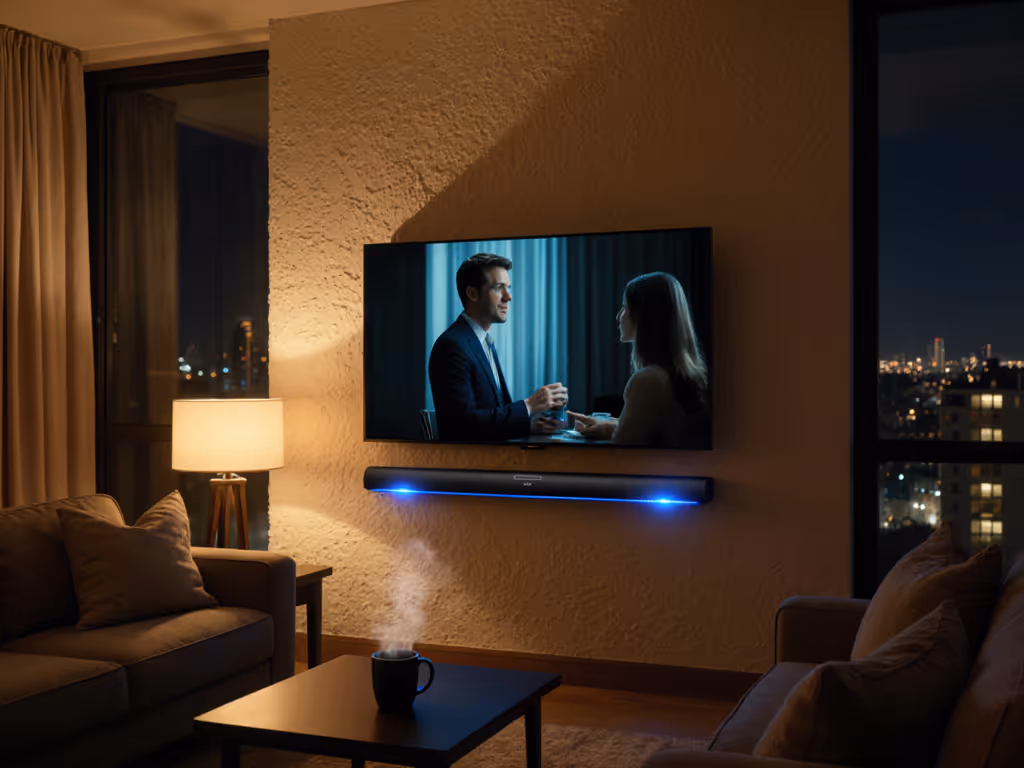
Beyond production, many creators live in apartments or share spaces with partners, roommates, or family. A boomy soundbar that satisfies neighbors at 11 p.m. while delivering usable monitoring at 2 p.m. feels like a contradiction (until you know what to prioritize in your setup).
Step 1: Choose Your Core Equipment
Assess Your Space and Daily Use
Start here: What's your primary listening scenario? For creators, this usually breaks into overlapping needs:
- Voiceover and podcast monitoring: You're playing back takes or streaming your guest's audio while you record. Dialogue clarity ranks as your #1 priority.[1][2] You need stable center-channel output and midrange definition without harshness.
- Editing and color grading: You're scrubbing timelines and A/B-ing cuts. Fatigue resistance matters; a soundbar that sounds great at first but wears on your ears after four hours is a creative liability.
- Personal viewing: You want shared immersion (partner approval check), without waking neighbors or triggering spouse complaints about boomy bass at family movie night.
- Streaming setup for your audience: If you create commentary videos or reaction content, you need clean passthrough audio, reliable HDMI ARC/eARC, and minimal latency between your recording software and the soundbar's output.[1]
Measure your furniture layout and listening distance:
- Seating distance under 8 feet: A compact, dialog-focused soundbar (40-48 inches) suffices. Examples include models like the Polk Audio MagniFi Mini AX, praised for crystal-clear dialogue even in tight spaces.[1]
- Seating distance 8-12 feet: A mid-size bar (55-65 inches) balances spatial separation with dialogue coherence. The Sonos Arc Ultra's 14-driver layout delivers this balance, with tunable Speech Enhancement that lets you set dialogue boost to low, medium, or high.[4]
- Open floor plan or seating beyond 12 feet: You may need a larger soundbar or a subwoofer to fill the space evenly. Larger bars like the Bose Smart Ultra and Sennheiser AMBEO Max are designed for this role.[1]
The Creator's Feature Checklist
Before you compare prices, confirm these non-negotiables:
- HDMI eARC or ARC support: Essential for uncompressed audio passthrough from streaming apps. If your TV lacks eARC, optical is a fallback, but it limits Atmos and format flexibility.[4] Confirm your TV's port spec before buying. For a deeper breakdown of connection quality and delay, see our ARC vs optical latency guide.
- Dialogue/speech enhancement modes: Not all soundbars offer user control here. Sonos Arc Ultra provides three settings; Devialet Dione uses patented ORB center-channel rotation and SPACE calibration.[4] Look for brands offering presets you can tweak.
- Stable network connectivity: For podcasting and streaming setups, rock-solid Wi-Fi or Bluetooth minimizes app dropouts. KEF's W2 platform includes AirPlay 2, Google Cast, and Spotify Connect - all tested for reliability.[4]
- Low-latency HDMI passthrough: If you use a capture card or streaming software alongside your soundbar, confirm the bar supports 4K/60 (or 4K/120 if gaming or high-frame-rate work applies) without audio sync drift.[1]
- Quiet-hours mode or volume leveling: A soundbar that auto-compresses dynamic range or mutes loud transients is your friend at 11 p.m. Sonos Audio models offer Sound Motion transducers tuned for reduced peak energy without sacrificing clarity.[4]
- No requirement for a separate AVR or multi-speaker setup: You want simplicity. Avoid products that push you toward receiver-based architectures; they invite cable clutter and complicate your one-remote harmony.[1]
Step 2: Compare Your Shortlist by Creator-Specific Criteria
Build a Comparison Matrix
Once you've identified 3–5 candidates, score them against these dimensions:
| Criterion | Why It Matters for Creators | Strong Examples |
|---|
| Center-channel clarity | Voiceover monitoring and dialogue-centric editing | Sonos Arc Ultra (9.1.4 with Speech Enhancement), Devialet Dione (patented center-channel rotation) |
| Midrange linearity (no honky coloration) | Podcast audio quality and vocal fatigue resistance | LG S90TR (7.1.3 with EQ presets), Yamaha SR-B20A (clear voice technology) |
| Subwoofer control (tight, not boomy) | Apartment compatibility and quiet-hour dependability | Sonos Arc + sub (modular, sub-out control), KEF XIO + KC62 (sub-out for any woofer) |
| Latency and HDMI passthrough | Capture-card feeds, live streaming, editing playback | Bose Smart Ultra (Dolby Atmos processing, tested for A/V sync) |
| Multiroom and streaming reliability | Synced podcast playback, guest audio over Wi-Fi | Sonos ecosystem (AirPlay 2, Spotify Connect), KEF W2 platform |
| Upgrade flexibility | Adding rears or subs without replacing the bar | Sonos (modular add-on framework), JBL Bar 1300XMK2 (wireless rear option) |
Product Category Recommendations for Creators
Best Budget Option for Voice Clarity: The Yamaha SR-B20A delivers dialogue lift through clear voice technology and creates solid stereo separation, useful for A/B'ing stereo mixes.[1] It's a smart entry point if you're testing whether your apartment's layout demands a sub or if you're bootstrapping a second workspace. Expect to spend around $150–250.
Best Mid-Range Dialogue Focus: The Sonos Arc Ultra combines 9.1.4 surround architecture with tunable Speech Enhancement (three levels) and a clean, modular upgrade path.[2][4] At $900–1,100, it's a real investment, but its stability across AirPlay 2, Spotify Connect, and Apple ecosystem tools makes it a creator favorite. If you're recording podcasts with remote guests or syncing audio across devices, this reduces friction.
Best Compact/Apartment Setup: The Polk Audio MagniFi Mini AX pairs a small bar (under 36 inches) with a wireless subwoofer. Reviewers emphasize its crystal-clear dialogue and wide sound stage despite its footprint.[1] It's around $300-400 and works well in studios under 12 feet of seating distance. The sub can be placed separately from your desk, reducing acoustic interference during recordings.
Best Premium, All-In-One Setup: The Sennheiser AMBEO Max or Devialet Dione appeal to creators with larger rooms or hybrid listening (serious music work + film review). The Dione's Sound Motion transducers and ORB center-channel rotation lock dialogue to your screen geometrically, and SPACE calibration auto-tunes the room.[4] Expect $1,500+, but it's a long-term creative asset if audio fidelity is inseparable from your brand.
Best for Gaming + Podcasting Hybrid: If you also stream gameplay or react to video, the Bose Smart Ultra delivers Dolby Atmos processing and proven lip-sync stability, though it leans toward immersion over dialogue focus. Pair it with a sub for dynamic range control in quiet hours.[1]
Step 3: Physical Integration and Placement
Measure Before You Buy
Soundbar width is non-negotiable. A bar wider than your TV stand or mounting surface invites return anxiety and frustration. For room-by-room tips on wall mounting and cabinet placement, use our soundbar placement guide.
Measurement checklist:
- TV stand width or wall-mount surface (side to side)
- Distance from TV bottom edge to stand top
- Clearance above TV (if wall-mounted) for IR blaster alignment
- Distance from bar center to listening position (confirms whether placement feels centered)
- Verify TV's HDMI port layout: eARC port position, whether it's obstructed by furniture
Placement Strategy for Creators
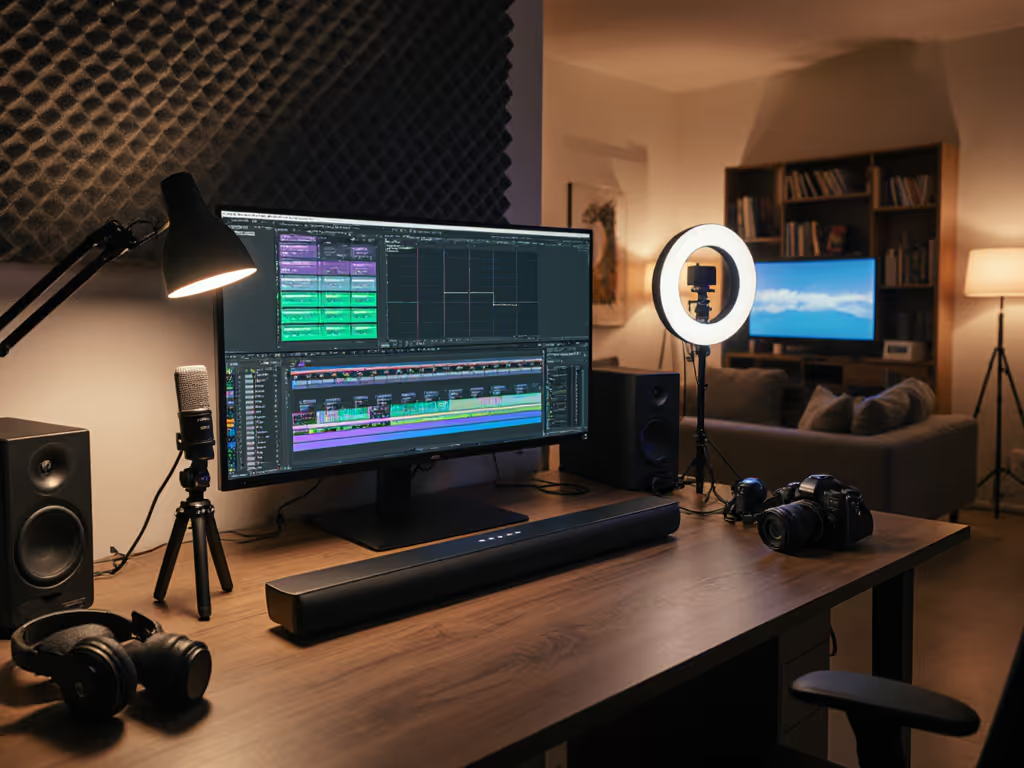
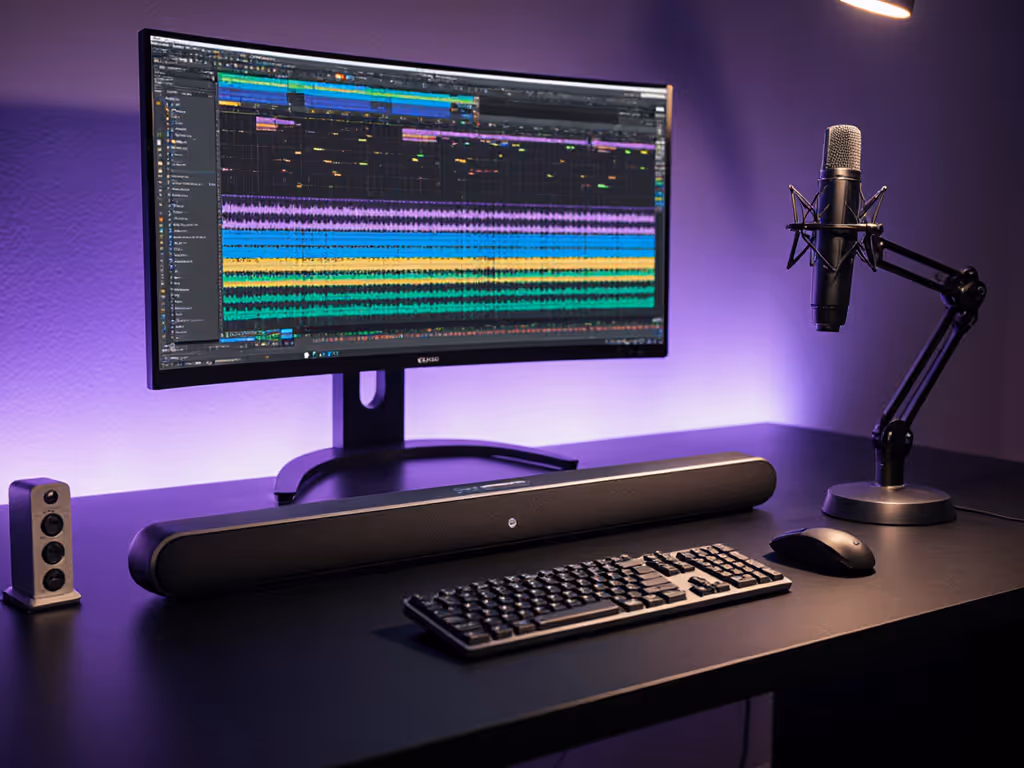
Desktop studio setup (editing station, voiceover recording):
- Position the soundbar above or below your monitor, slightly angled toward ear level if angled mounting is feasible (no-drill options exist for renters).
- A subwoofer can sit under your desk or in a corner behind you, but keep it away from microphone stands to minimize vibration coupling into your recordings.
- Run cables behind monitor arms or under-desk cable trays to keep your desk clean and minimize acoustic reflections.
Living room + shared viewing (partner approval check):
- Mount the bar on the TV wall or place it on a stand in front of the TV if the stand is wide enough.
- Confirm the bar's bottom edge doesn't block the TV's IR sensor. Test your remote before finalizing placement.
- If your TV is wall-mounted above a fireplace or awkward spot, a soundbar can be wall-mounted with a bracket, but confirm your renter's policy first.
Subwoofer placement (if included or added later):
- A small, sealed sub works better in apartments than a large ported design; it tightens bass response and reduces neighbor interference.
- Avoid corners (bass bloats); try a mid-wall placement or tucked beside a couch.
- If you're recording voiceovers, isolate the sub from your desk area. Bass vibrations can leak into microphone preamps if they're too close.
Step 4: Cable Routing and Audio Input Configuration
HDMI eARC/ARC Setup
- Identify your TV's eARC-capable HDMI port (usually HDMI 3 or 4; check your manual).
- Connect your soundbar's HDMI input to this port.
- Connect content sources (Roku, Apple TV, gaming console, laptop HDMI output) directly to other HDMI ports on the TV. If you need a refresher on connection methods, follow our soundbar setup guide for ARC, optical, and Bluetooth.
- In your TV's audio settings, enable eARC/ARC and set audio output to the HDMI port connected to the soundbar.
- On the soundbar, set input mode to HDMI eARC and confirm a green light or on-screen indicator lights up. This means handshake is successful.
- Test one streaming app: Netflix, YouTube, or your podcast platform. Audio should flow. If lip-sync is delayed, consult the soundbar's manual for AV sync adjustment (usually a setting in the app).
Subwoofer Wireless Pairing
If your soundbar and sub are wireless (most modern models):
- Power both units on and place the sub within 15 feet of the bar.
- Press the pairing button on the sub (usually a small reset button on the back) for 3–5 seconds until an LED blinks.
- Look for a pairing prompt on the soundbar's app or remote. Confirm the sub's name appears.
- Test: play a movie with bass. You should feel low-frequency response in the sub; the bar handles midrange and dialogue.
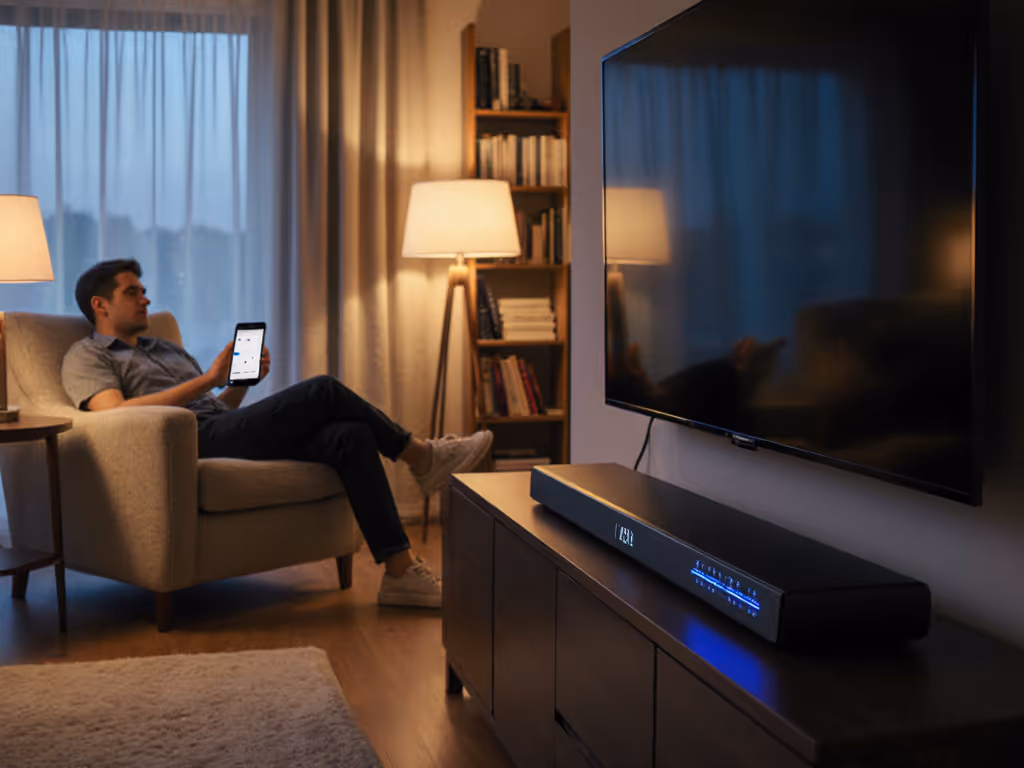
Streaming App Configuration for Podcast/Voiceover Monitoring
If you're using your soundbar to monitor live podcast feeds or voiceover takes:
- Spotify Connect: Open Spotify on your laptop/phone, tap the Devices button, and select the soundbar. Audio routes directly; latency is minimal.
- AirPlay 2: On Mac/iPhone, swipe Control Center, tap Audio Output, and select the soundbar. Same principle: direct routing, low latency.
- Zoom/Google Meet: If you're co-hosting or taking guest audio, set the meeting app's audio output to the soundbar (usually in audio settings). This routes guest audio through the soundbar for monitoring while you record locally.
Step 5: Tuning for Your Workflow
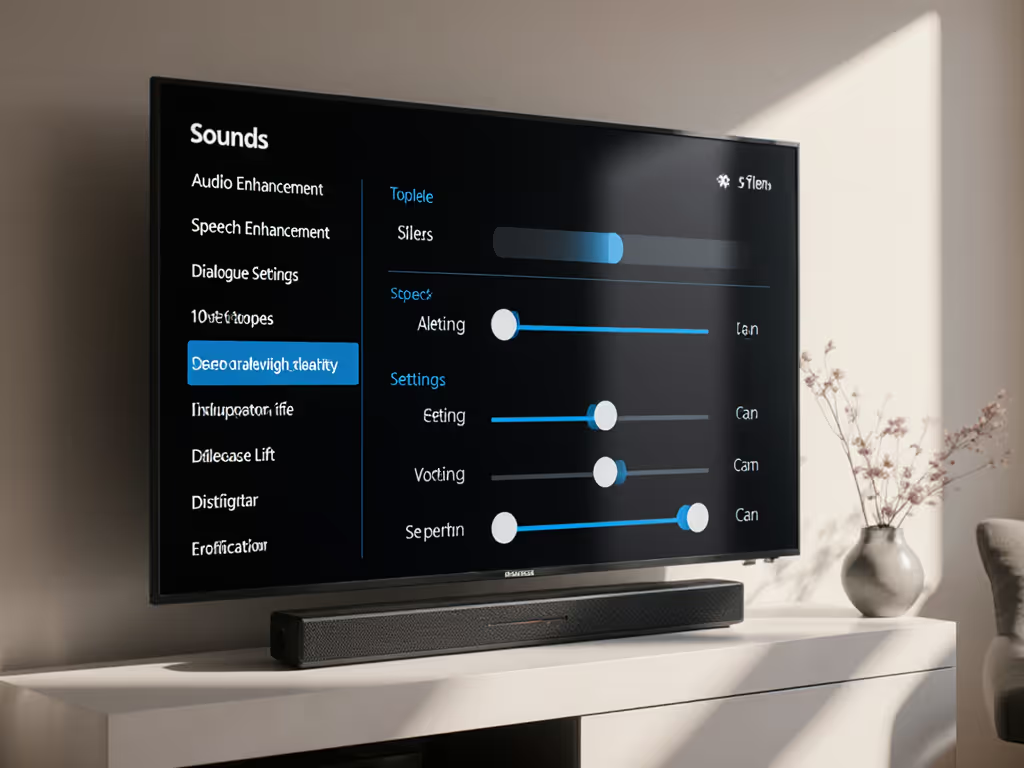
Dialogue Enhancement and Speech Clarity
Most quality soundbars now offer dialogue or speech enhancement modes. Here's how to optimize:
- Play a familiar voiceover or dialogue scene (e.g., a podcast intro or movie clip with clear speech).
- Access the soundbar's app (Sonos, LG, Bose, KEF, etc.) and locate Speech Enhancement, Dialogue Lift, or Voice Clarity. For model-by-model advice on the most effective modes, check our soundbar presets guide.
- Cycle through settings (off, low, medium, high) at a comfortable listening level.
- Ask yourself: Can I hear sibilants (S sounds) and consonants clearly without harshness? Does the voice feel present but not forward?
- For voiceover editing, set dialogue mode to medium or high and use it as your reference. This ensures your edited mix translates to how listeners will hear it on similar systems.
- For shared viewing (partner approval check), start at low or off and only increase if whispers are buried.
Quiet-Hours Profile Setup
Many creators work late or live with early risers. Quiet-hours tuning prevents neighbor complaints and maintains household harmony:
- Access your soundbar's app and find Night Mode, Quiet Mode, or Volume Leveling.
- Enable Dynamic Volume Compression: This reduces loud peaks (explosions, action scenes) without lowering overall volume.
- Set a maximum volume cap (e.g., level 30 out of 100) during late hours.
- Test: play action content at your normal evening listening level. Dialogue should remain clear; bass should feel controlled, not thin.
- Schedule this mode to activate automatically if your soundbar supports it (Sonos, some Samsung models do).
Room Correction and Equalization
If your soundbar includes room correction (Devialet's SPACE, LG's AI Sound Pro, KEF's QuickTune), run it once in your primary listening position:
- Soundbar's microphone measures reflections and resonances in your room.
- The system auto-adjusts frequency response to compensate for furnishings, wall color, and floor material.
- If the soundbar offers EQ presets (Bright, Warm, Balanced), test each with dialogue-heavy content. Note which feels most natural for your editing workflow.
- Lock in your preference and use it as your reference for future editing decisions.
Step 6: Verify Compatibility and One-Remote Harmony
HDMI CEC and One-Remote Control
CEC (Consumer Electronics Control) is the magic that lets one remote control your soundbar, TV, and other devices:
- Confirm your TV and soundbar both support CEC. Check the manuals or contact support if unsure.
- In your TV's settings, enable HDMI CEC (called "AnyNet+" on Samsung, "Bravia Sync" on Sony, "Simplink" on LG).
- In your soundbar's app, enable CEC control and set it to respond to your TV remote.
- Test: mute your TV remote. The soundbar's volume should also mute. If not, CEC isn't connected; re-seat HDMI cables and re-enable.
- Once CEC works, you can delete your soundbar's physical remote (keep the backup). This simplifies your desk or coffee table.
Note: CEC reliability varies by brand. Sonos and Bose are generally rock-solid; some Samsung bars have intermittent CEC issues. If one-remote harmony doesn't work smoothly after troubleshooting, fall back on the soundbar's app for volume control.
Confirm Audio Format Support
Streaming services vary in what they send over HDMI eARC:
- Netflix, Disney+: Usually 5.1 Dolby Digital; some content offers Dolby Atmos (if your soundbar supports it).
- Apple TV 4K: Dolby Atmos when available; Dolby Digital 5.1 fallback.
- YouTube, Spotify: Stereo or 5.1 depending on content.
Check your soundbar's manual for supported formats (Dolby Digital, Dolby Atmos, DTS, DTS:X, PCM). Not every brand supports every format. If a format you need isn't listed, confirm it won't cause audio dropouts or errors (it shouldn't, but it's worth a quick test).
Step 7: Monitor and Adjust During Your First Week
Listen for Lip-Sync Issues
Some streaming apps have notoriously poor audio sync. During your first week, watch a dialogue-heavy film or podcast and listen for audio lag. Does the voice precede or lag the mouth movement?
If you notice lag:
- Check your TV's audio sync settings (sometimes called AV Sync or Lip-Sync Adjustment). Most TVs have a slider: negative values delay audio, positive values delay video.
- Try adjusting plus or minus 50-100 milliseconds and retest.
- If the problem persists, try a different streaming app or input (HDMI vs. optical) to isolate the culprit. For a full checklist of fixes, see our soundbar troubleshooting guide.
- Note which apps have issues; you can't fix codec-level problems via soundbar settings, but knowing the source helps you adjust your monitoring expectations.
Document Your Preference Profile
Keep a simple note:
- Dialogue/Speech Enhancement setting: (e.g., "Medium for editing, Low for movies")
- EQ preset used: (e.g., "Balanced for voiceovers, Warm for evening listening")
- Volume cap during quiet hours: (e.g., "Level 28 max after 10 p.m.")
- CEC working: (Yes/No; troubleshooting steps if No)
- Most-used input method: (eARC HDMI, AirPlay 2, Spotify Connect)
This reference sheet makes it painless to reconfigure after a firmware update or if you travel with the soundbar.
Step 8: When and How to Add a Subwoofer
Assess Your Need Honestly
Not every creator needs a subwoofer. Ask:
- Is dialogue getting lost in a large room or open floor plan? If yes, a sub helps the bar breathe and extend low-end context (room tone, ambient bass in podcasts). If no, skip it for now.
- Are neighbors complaining about bass or vibration? If yes, reconsider a sub; you'll need tight control to avoid thumping. A sealed sub is better than ported.
- Is your editing work bass-heavy (electronic music, hip-hop, film sound design)? If yes, a sub helps you hear what listeners on big systems will hear. If you mostly edit dialogue or podcasts, a good soundbar alone may suffice.
Selection and Placement
If you add a sub:
- Match the brand: Sonos Arc + Sonos Sub, KEF XIO + KEF KC62, etc. Cross-brand matching often works but introduces tuning unknowns.
- Choose sealed over ported for apartment living: tighter response, less neighborhood bleed.
- Place it away from your recording area (desk, mic stand) to prevent vibration coupling into audio signals.
- Run the wireless pairing once, then leave it alone. Most subs auto-sync if powered together.
Summary and Final Verdict
Choosing and setting up a soundbar for content creators comes down to clarity, stability, and household harmony. Unlike typical soundbar buyers chasing immersion, you need a tool that respects dialogue, tolerates quiet-hour constraints, and integrates seamlessly with your editing and streaming workflows.
Your action plan:
- Identify your primary space and listening distance (desk, living room, hybrid) and measure furniture.
- Prioritize dialogue clarity and speech enhancement modes over raw power or surround-sound channel count.
- Confirm eARC/ARC support, streaming app reliability (AirPlay 2, Spotify Connect), and one-remote CEC before buying.
- Choose from the creator-friendly shortlist: Yamaha SR-B20A for budget clarity, Polk Audio MagniFi Mini AX for compact apartments, Sonos Arc Ultra for modular mid-range, or Sennheiser AMBEO Max for premium audio fidelity.
- Test placement and cable routing in your actual space (desk, living room, hybrid), not a showroom, before finalizing.
- Run room correction and tune dialogue modes during your first week, then lock in your reference profile.
- Add a subwoofer only if your room or workflow demands extended bass; most creators thrive with a good bar alone.
When everything is tuned, you'll find yourself in a familiar situation: finishing a long edit, hitting play, and hearing every whisper and vocal nuance clearly at a comfortable volume while your household sleeps peacefully behind closed doors. That's when you know your setup works. Not because it sounds like a cinema, but because clarity at comfortable volume is the backbone of shared enjoyment and everyday harmony, and your creative work finally reflects what you actually hear.
Give yourself a week to settle in, resist the urge to tweak obsessively, and trust your ears. You've built a creator's soundbar setup, not an audiophile's monument. That's exactly what you need.